 Image: Flat 2 apartment - interior visualization in blender
Are you looking to create captivating interior designs using Blender? Look no further! In this tutorial series, Mohamed Beniane, an experienced 3D artist and architect, takes us through his process of creating stunning interior designs in Blender. From gathering references to post-production, Mohamed shares quick tips and checklists to help you elevate your interior visualization skills.
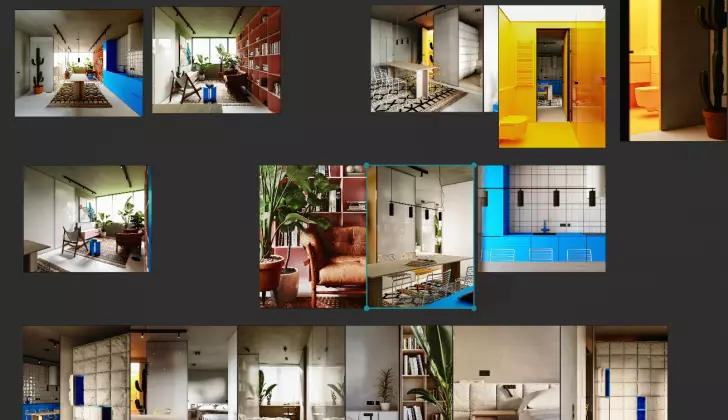
Step 1: References
To kickstart the design process, Mohamed suggests using PureRef, a software that allows you to gather and organize your references. By drag and dropping the references directly into your project, you can ensure a seamless workflow.
 Image: Flat 2 apartment - interior visualization in blender
Step 2: Modeling
When it comes to modeling, Mohamed advises starting with the elements that can be easily modeled, such as kitchen fixtures, bookshelves, and cabinets. For more complex models, he recommends using his FREE CC0 models available on Gumroad. Additionally, Chocofur assets provide a vast library of resources for your designs. For the perfect finishing touches, Mohamed combines Quixel Megascans' realistic plants with photo-scanned plants.
 Image: Flat 2 apartment - interior visualization in blender
Step 3: Texturing
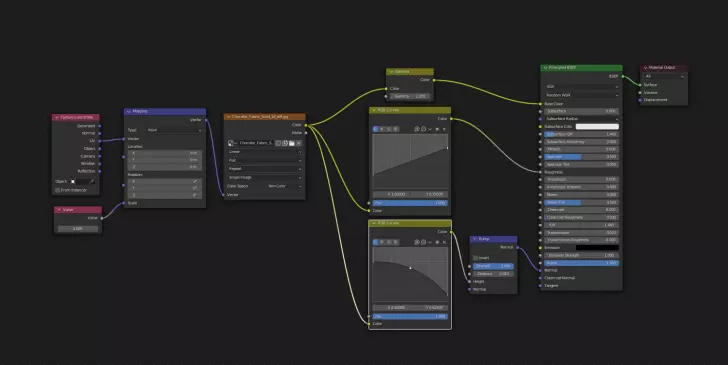
To bring your designs to life, texturing plays a crucial role. Mohamed suggests using textures from Quixel Megascans for the walls and floors. For the bedroom floor, he relies on a high-quality Wood texture from Poliigon. Additionally, he shares a technique to create multiple texture maps from a single black and white map using RGB nodes. This allows for greater versatility in your designs.
 Image: Flat 2 apartment - interior visualization in blender
Step 4: Lighting & Composition
A well-lit and well-composed scene is key to creating visually appealing interior designs. Mohamed advises using the rule of thirds to achieve better composition in Blender. By enabling composition guides and selecting the thirds option, you can easily follow this rule. Additionally, Mohamed utilizes HDRI lighting, particularly Overcast HDRI, with exposures ranging from 12 EV to 24 EV. This brings depth and realism to your scenes.
 Image: Flat 2 apartment - interior visualization in blender
Step 5: Render Settings
While focusing on the artistic aspect of your designs, Mohamed suggests not getting too caught up in the render settings. However, if you prefer to fine-tune your settings, he recommends using Full global illumination for realistic results. Sampling can be increased for cleaner images, but moderation is key. Finally, Mohamed emphasizes using the Filmic look and experimenting with different contrast levels.
Step 6: Post-production
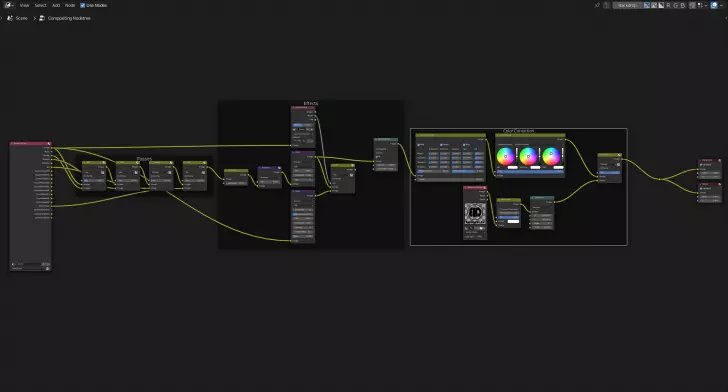
After rendering your scene, the post-production stage allows you to add the final touches to your images. Mohamed recommends enabling passes such as Denoising Data, Glossy Direct and Indirect, shadows, and AO. With these passes, you can enhance your images using the Blender compositor. Applying effects and color corrections creates a polished and professional look.
 Image: Flat 2 apartment - interior visualization in blender
Step 7: Tips and Tricks
Mohamed shares some valuable tips and tricks to elevate your interior visualization skills:
- Use high-quality assets
- Pay attention to detailed modeling
- Incorporate PBR materials for realistic textures
- Consider physical light direction and color
- Seek inspiration from references
- Utilize post-production techniques
- Focus on the art, rather than getting lost in settings
Ready to create stunning interior designs in Blender? Follow Mohamed Beniane's tutorial series to hone your skills and transform your visions into reality. For more tutorials, future profiles, and downloadable assets, visit Mohamed Beniane's website.
Best regards, Mohamed BENIANE - Benianus 3D Architect | 3D Artist


