If you're looking to install the Dometic RTX 2000 -12 Volt Air Conditioner (6,824 BTU) in your van or RV, we've got you covered. In this article, we'll provide you with all the information you need to make the installation process as simple and cost-effective as possible.
Optional Installation Kits: Which Ones Should You Choose?
Dometic offers two optional installation kits: the "installation hardware kit" and the "wiring kit." While both kits provide essential components for installation, they come at a price. However, not all parts included in these kits are necessary for most installations.
In the "installation hardware kit," you'll find a large interior trim piece and a 24-volt wiring harness that may not be suitable for your 12-volt AC unit. Similarly, the "wiring kit" can be quite expensive compared to a DIY solution.
 Picture: Dometic RTX 2000 -12 Volt Air Conditioner
Our Recommendation: Essential and Cost-Effective Components
We highly recommend purchasing the "installation hardware kit" as it includes crucial elements like crossbars, brackets, and threaded inserts necessary for a smooth installation process.
However, if you want to save some money and have the skills, you can forgo the "wiring kit" and use your own wire. Here's a list of recommended components you'll need to wire up the unit more affordably:
- Red and black 4 AWG wire: This wire will serve as the main 12-volt power supply from your DC bus bar to the AC unit.
- Fusing for the red, positive wire: Depending on your setup, you can use an 80 amp mega fuse with a Lynx Distributor or a MIDI fuse holder and an 80 amp MIDI fuse.
- Southwire splicers with screw terminals: These splicers are used to connect the larger wire from the AC unit base to your 4 AWG 12-volt supply wires.
- 18 AWG, 2-conductor wire: This wire is used to connect the smaller wires from the AC unit base to the 12-volt DC supply/bus bar for voltage sensing purposes.
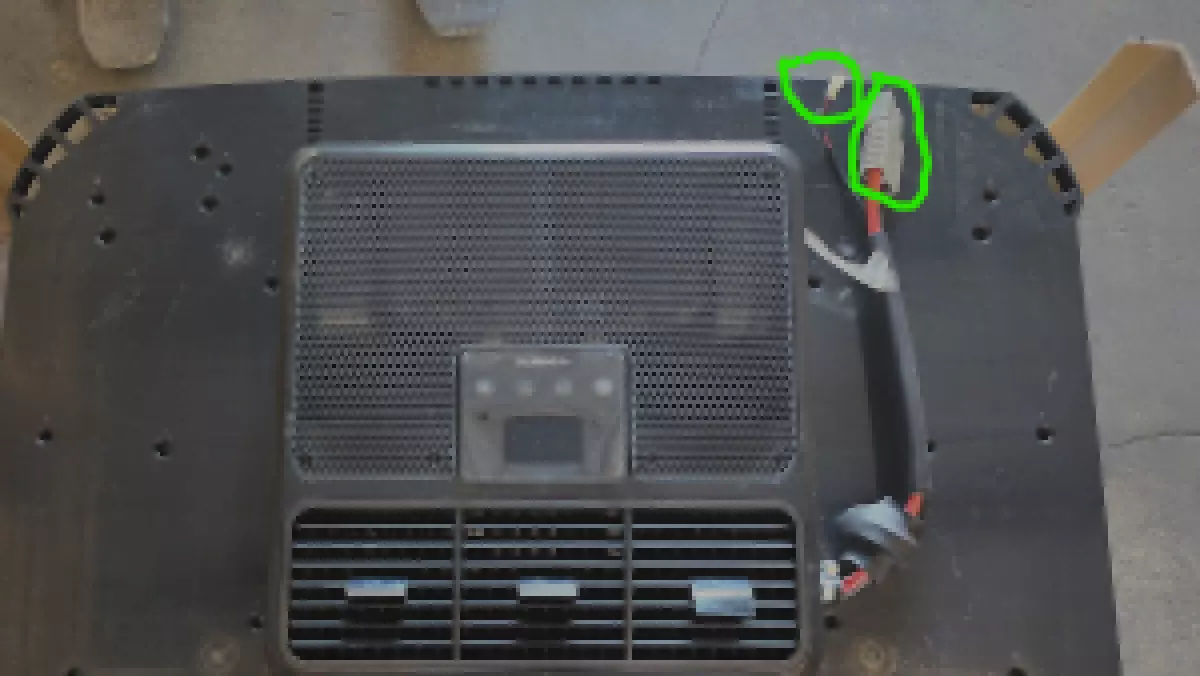
Please note that if you choose to wire the unit without the Dometic "wiring kit," you'll need to remove the "Anderson" connector and the small white connector from the AC unit. This will allow you to use "butt splice" connectors to bridge the wires from your 12-volt DC power system.
 Picture: Dometic RTX 2000 -12 Volt Air Conditioner Installation
Warranty Support and Important Considerations
If you decide not to use the Dometic "wiring kit" and encounter any issues that require warranty support, you must demonstrate that your wiring is not the problem. To do this, document your installation with photos and ensure that your wiring is sufficiently sized (wire gauge) and functional by measuring the voltage at the end of the circuit where it connects to the AC unit.
Another crucial point to note is that the "installation hardware kit" includes a shorter gasket for the roof, while the "wiring kit" includes a taller gasket. If you omit the "wiring kit," you'll only have the shorter gasket.
Enjoy Affordable and Efficient Cooling
By following our advice and selecting the essential installation components, you'll be able to install the Dometic RTX 2000 -12 Volt Air Conditioner with ease and at a lower cost. Enjoy the comfort of efficient cooling in your van or RV without breaking the bank.
For a photo tour of the "installation hardware kit," click here. For a photo tour of the "wiring kit," click here.
Remember, with the right components and a bit of DIY know-how, you can create a comfortable living space on the road without compromising your budget. Stay cool!


